Introduction
Gacha games have long had their own little following before Genshin Impact came around, but none came close to being half as popular (barring Fate Grand Order, but that’s a story for another time). For those of you who may be new to the idea, gacha refers to the slot machine where people insert money in the hopes of winning one of the numerous prizes being offered. In Genshin Impact terms, this means paying money to get a chance to add one of the many characters and weapons to your team.
Released by developer studio Mihoyo in 2020, Genshin Impact offers players an open world experience within the gacha game genre, as opposed to the side-scrollers in more conventional titles. The game itself consists of several mechanics, most notable of which is the way elements interact with one another, a vital concept to grasp in order to master combat.

Starting Out
Before we begin, you should decide which platform you want to play on. Genshin Impact is available on both PC and mobile devices, as well as PS4. However, you can only share save data between PC and your mobile device. Something to keep note of if you’re considering playing it on PS4.
In full gacha game fashion, shortly after you’ve completed the beginner quests and got yourself some free gems, you should have enough to do a few rolls for a new character. It doesn’t really matter in the long run, but if you want to start strong, you’ll want to aim for 5-star characters. Diluc is generally the best choice out there if you’re pulling on the standard banner. More on that later on. There are also exclusive banners for certain characters on Genshin Impact, and you can choose to draw from those banners if you want. The standard banners offer characters from the general pool, and you also have a chance to draw a 5-star weapon from it. However, you’ll want to avoid weapons, especially if you’re just starting out. That’s because you can always use a character, but a weapon without a character capable of equipping it is little more than clutter in your inventory. If you’re patient enough, you can keep re-rolling until you get the character you want.
In the beginning, you should aim to get to Adventure Rank (AR) 12 as soon as you can. This unlocks daily commissions, which provide a sizable chunk of EXP and friendship points daily. The following are unlockable at different level thresholds: Expeditions (AR 14), Co-Op Play (AR 16). Expeditions allow you to send characters out to collect materials on your behalf. It’s not much but it’s better than nothing. Co-Op Play allows you to connect with friends and just adventure together. Do note that you can only join players whose World Levels are the same as or lower than yours.

Wishes and Banners
Like any other gacha game, assembling a team of characters is a huge selling point for Genshin Impact. This is done via the Wish system, which uses up the Fate currencies. There are two types of Fate currency in-game, namely the Intertwined Fates and the Acquaint Fates. Each Fate token corresponds to a single Wish, and can be redeemed via Primogems. The difference between Intertwined Fates and Acquaint Fates boils down to the banners that they can be used for.
In Genshin Impact, there are always two or more banners active at any given period. There is the standard banner, the weapon banner, and the event exclusive banner. Acquaint Fates are solely used on the standard banner, which allows you to summon from a pool of primary characters and weapons. The Intertwined Fates on the other hand, are used on the weapon and event exclusive banners. These banners come with characters and weapons that are only available for a limited time, and thus are usually the more popular options among players compared to the standard banner. You will also have higher rates for certain characters and weapons in these banners, so it makes sense to invest your Primogems into them if there’s something or someone you’d like to get. Do note that your pity counter does not carry over between the different banner types, so be sure to consider your resources wisely before investing too heavily on it.
There are various ways you can earn Primogems in Genshin Impact. The most straightforward option would be to purchase them from the in-game store. If you’re a free-to-play player, you can also choose to get them solely from Quests, Daily Commissions, completing certain achievements, as well as defeating special mobs. If you don’t mind spending a little, you can opt in for the Blessing of the Welkin Moon, which gives you about 3000 Primogems (including Genesis Crystals) for the month for $4.99.
Progression Priorities
To actively progress in the game, outside of story quests and exploration, you’ll want to knock your dailies out right off the bat if you can. Prioritize using up your resin right away, either by farming domains, hunting bosses or converting it into Condensed Resin. Next, you should clear out your daily commissions. Remember to collect your materials gathered from Expeditions, and send out characters on new Expeditions as you do. Reputation requests are also a decent weekly source of Mora even if you’ve already cleared all of them. Remember: You can never have enough Mora. Keep track of the progress of your Adventurer Handbook, and work towards clearing out any daily or weekly quests. If you’re farming materials for a certain character, you should check out the gathering points as well, as these generally spawn every 1-2 days. The best thing to do is mark out these points on your map so you don’t have to remember them all.
When it comes to exploration, you will want to focus on finding as many Statues of the Seven, teleport waypoints, Geoculus and Anemoculus as quickly as you can. Statues of the Seven and teleport waypoints will help to facilitate fast travel and open up the map for you, whereas Anemoculus and Geoculus work towards increasing your stamina reserves, among other rewards. Always keep track of the things you find on the map with icons, to save yourself time doubling back and checking afterwards, especially with the Anemoculus, Geoculus, and Crimson Agates later on.

Team and Character Building
If you’re a free-to-play player, you should always remember to be careful with which characters you decide to invest in. It might be tempting to level everyone up as much as you can, but it gets very resource intensive later on, especially with skills, artifacts, and weapons, so save every Mora and material you have for the characters you really like. That said, if you do want to level your characters regardless, try not to go beyond Level 20, as this is still fairly cheap and manageable. It also gives you a free summon gem, so the benefits outweigh the costs overall. You can level characters past that at your own discretion.
For team builds, it’s largely up to personal preference, provided you can sustainably hit the DPS checks when fighting against mobs and bosses. Genshin Impact is a PvE game at its core, so you don’t have to worry about gear or characters too much if you can kill most of the enemies quickly enough. Elemental Resonance would be one factor to look out for, as these will provide certain buffs depending on the elemental composition of your team.
The characters that make the team can be divided into certain roles. These are not strict in-game terms, and there can be more niche roles out there, but generally, you should have a Carry, a Healer and a Support in your team. Your Carry will be the main character that you use in combat, and typically stays active the longest. Carries normally come with high DPS potential and low skill cooldowns to facilitate that DPS. Examples of a powerful Carry would be Diluc, Ganyu and Klee. You also have Healers, which help keep your characters alive and lower your dependency on food items to restore health. For example, Qiqi and Barbara. Your Support is the one that buffs your team’s combat ability, either by way of elemental reaction, elemental recharge, attack increase, and so on. Examples include Sucrose, Bennett and Mona. Your fourth character will typically fill in the gaps between each of these characters in their designated roles.
Do bear in mind that this is just an oversimplification of roles based on what we think is the optimal way of utilizing the skills and talents of these characters, and that they can be built differently according to your preferences.
Combat
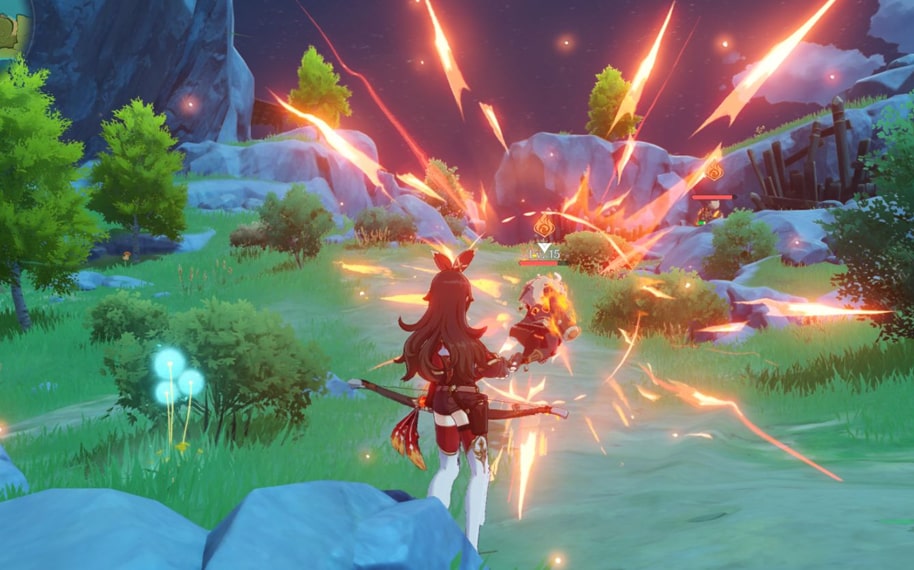
The combat in Genshin Impact centers around its 7 elements, or more specifically, the way they interact with one another. There’s Pyro, Cryo, Geo, Anemo, Electro, Hydro, and Dendro. Dendro is only found on enemies for the time being so as a player, you’ll be building a team based on the other 6 elements. As a general rule of thumb, you should aim to build a team that can sustainably deal damage to enemies of most, if not all elements, instead of a team which has one of each element. See the difference?
The elements themselves can be classified into 2 types: Aura Elements and Trigger Elements. This classification helps determine which element takes precedence in an elemental reaction, which consequently determines the resulting effect of the reaction. For example, using Hydro on an enemy after Pyro will give a 2.0x damage boost to the attack triggering the reaction, while the inverse only gives a 1.5x damage boost, even though it’s the same reaction.
Aura Elements are the elements that are inherent on any given object, while Trigger Elements are the elements that are capable of activating an elemental reaction when in contact with a different Aura Element. For example, a Pyro Slime will almost always have its Pyro status active, so any elemental-infused attack you deal to it will likely be the Trigger Element, with a few notable exceptions. Anemo, Geo and at the time of this writing, Dendro, are the only elements that are strictly Aura Elements only, meaning they can’t be used to activate any elemental reaction. Take the scenario of a Pyro Slime again. Even though you can spread the Pyro effect on a Pyro Slime with Anemo, in reality, the Pyro element is the one acting as the Trigger Element here.
You should be amply prepared to face most enemies once you have a decent understanding of Aura and Trigger Elements, and the effects from various elemental reactions.
Like the elements themselves, reactions can be broken down into 2 types: Transformative Reactions, and Amplifying Reactions. Amplifying Reactions are very straightforward; the attack infused with the Trigger Element will deal more damage upon catalyzing the reaction. The 2 Amplifying Reactions in the game right now are Melt and Vaporize.
On the other hand, Transformative Reactions induce a variety of effects, generally dealing additional elemental damage, and consist of Freeze, Overload, Electro-charged, Superconduct, Shatter, and Swirl. With Transformative Reactions, the triggering character’s Level, and more importantly, their Elemental Mastery, as well as the target’s elemental resistances, are the only variables taken into account. Unlike Amplifying Reactions, Transformative Reactions are unable to crit, not affected by the attack stat, and not reduced by an enemy’s defenses. As such, it is not limited by a character’s individual DPS potential, nor will it be affected by the stats of the character applying the first element, if there is one.
Ideally, your characters should be inflicting elemental-infused attacks in a predetermined sequence in order to maximize your DPS potential. Figuring that out is undoubtedly going to take a lot of trial and error, and there’s a lot of math involved, so try to keep a spreadsheet around to track your different team comps to figure out which works best for you.
Optimizing Builds
Weapons, artifacts and skills are a very nuanced topic in Genshin Impact. We won’t go too in-depth into these right now, but do note that whichever one you choose to invest in should benefit you in the long run.
For weapons, it’s relatively straightforward. Each character can only wield a certain type of weapon (Tartaglia technically wields a bow, even though he melees), and the two most important attributes to take note of are the base attack and the weapon’s bonus effect. In Genshin Impact, any multiplier you get from artifacts and skills are most often calculated based on your character’s base attack along with your weapon’s base attack. For example, Bennett’s attack boost from his Elemental Burst applies based on the sum of his base attack and the base attack of the weapon he wields, not his total attack stat, which is the sum of all his artifact and weapon bonuses. The weapon’s bonus effect on the other hand, can affect your play style in a few different ways. For example, Thrilling Tales of Dragon Slayers will give an attack buff to the subsequent party member that swaps in for the wielder, making it especially devastating in the hands of characters like Mona, despite its low rarity.
A few short hours into the game and you should have some understanding of artifacts. These are accessories equipped to your character, and they give a variety of bonus stats. They also give certain set bonuses if you equip 2 or 4 of a given artifact set. Different artifact sets will provide you different set bonuses. Artifacts are also divided by rarity. The higher the rarity, the greater the artifact’s level cap, meaning higher stat bonuses if you max them out.
Artifact stats come in 2 forms: a main stat, and a sub stat. Some artifacts have a fixed main stat, while others can vary between a range of different bonuses. The sub stat slots on an artifact will vary in both the stat bonus provided as well as the extent of said bonus. A higher rarity artifact will have more sub stat slots, and a higher stat bonus range, giving your characters a bigger buff overall. Needless to say, you will be spending quite a bit of time farming for the right artifacts. However, bear in mind that the right sub stats could potentially have an equal or greater effect in combat than set bonuses, so it’s not always a dealbreaker even if you don’t always get the artifacts that you want, if the stats you’re looking for can be found on a different artifact set.
Each artifact domain will have a chance of dropping several artifacts of varying rarities, between at least 2 different artifact sets. We recommend waiting until you’re at least AR 35 before attempting artifact domains, as this will be your first decent chance at getting a 5-star artifact to drop. It may be worth investing in 4-star artifacts as well, if they have a good stat composition. You could always use them to upgrade your 5-star artifacts later on once you have them. 80% of the total EXP will be transferred over when you upgrade so it’s a fairly decent trade-off between available resources and combat potential.
With skills, it’s largely up to your play style. After all, there’s no use in leveling up a skill on a character if all you’re doing is keeping them in the back line. You’d just be wasting resources. Focus on leveling up your Carry’s skills first, depending on which ones give you the greatest edge in combat. For example, with Keqing, it may be a good idea to level up her normal attack skill, given its frequency of being used.

Tips & Tricks
Count your wishes, and make your wishes count
If you’re aiming to get a 5-star character or weapon, the published rate of pulls is 0.6%. You’re guaranteed one on your next pull if you did 90 pulls without getting at least one 5-star character or weapon. This brings the average to around 1.6%, still abysmally low by industry standards.
That said, Genshin Impact has a soft pity mechanic, which drastically increases your odds of getting a 5-star pull. This soft pity is typically around the 75 pull mark, during which your chances of drawing a 5-star item increases to over 70%. Miss this, and your best bet will be at the 91st pull. All in all, still not the best, but could be worse.
You should also remember that the pity counter doesn’t carry over between standard, weapon and limited banners. So think what you want to wish for wisely before spending your primogems on a banner.
Stamina management
Stamina is a vital resource in Genshin Impact, especially if your characters are primarily geared towards charged attacks in combat. One trick to mitigate stamina loss is the double hop. Continuously jumping will allow you to move at a greater speed than if you had walked normally, and this can be done even after your stamina is depleted, helping you to maintain sprinting speed when you wouldn’t be able to otherwise.
In the heat of battle, you can manage stamina with the help of character swaps and Elemental Burst animations, which are more closely tied with dodging attacks than stamina management, as we will see in the next section.
iFrames
iFrames, or invincibility frames, are the brief moments within the animation sequence in which damage isn’t calculated. Ergo, you are unable to take any damage, making it a great tool to have when up against a powerful enemy. The concept of iFrames is not limited to Genshin Impact, but one common trait it shares with other games is that it requires a fairly decent amount of microing skill and timing to get right.
Fortunately, the iFrames in Genshin Impact are rather forgiving on the timing, especially with the animations of Elemental Bursts. You can also accomplish this with character swaps, although that’s slightly more difficult to get right. Albeit so, we recommend you practice a little bit with iFrames during character swaps, as it is more sustainable than relying on Elemental Bursts. This will come in handy in the long run, particularly when you’re up against a boss while in low health.
Familiarize yourself with Internal Cooldowns
We’ve mentioned previously that elements can be applied on a given subject using characters’ Elemental Skills or attacks. When another element interacts with that subject, an elemental reaction occurs. After which, both elements are cleansed from the subject’s status. The internal cooldown is the time after which the elemental status is cleared from the subject before another element can be applied. This is not the same as internal cooldowns on elemental reactions (which don’t exist), but they do have a causal effect on reactions.
Internal cooldowns are only found on individual character skills and attacks. And each of these work independently of one another. For example, each of the three Pyro attacks in Diluc’s Elemental Skill have their own individual internal cooldown, and are thus capable of activating the Pyro element or triggering reactions independent of each other’s internal cooldowns. In a similar fashion, Mona’s Elemental Burst has a 2-second internal cooldown after the Illusory Bubble status is applied onto enemies before Pyro can be used in order to successfully trigger the nuke.
